Blitzers
For the four blitzers of the team I had already formed an idea of what I wanted them to look like. I used the Orruk Ardboyz kit as the main basis of the models. I also had a 40K gretchin box and 40k orc stormboyz. Looking at the models on the various sprues a picture started forming in my head.
One of the great things about the Ardboyz is that they are from the the same range as the Orruk Brutes which I used for the Black Orc Blockers. Size wise the Ardboyz models are smaller then the Brutes so on the game board the models will look the the right proportions to each other.
An Orc blitzer with a barrel on it's back in which was riding a goblin. The goblins would be in a number of poses "assisting" the blitzer in some non legal fashion. Rules wise they are just Blitzers but background wise it would give the team a unique ( I hope) visual representation.
I started by blu-tacking a model together with all the components, to see if it would work.


For the photo above I took an Ardboy model cutting away any weapons. I then took the rocket pack from the Stormboyz set , cut a gretchin in half and put that in the top of the rocket barrel. Originally I only put the model together to see if it worked. I didn't want a Goblin with a gun as that would have looked out of place. Looking at the model above, however, gave me an idea. I could turn the gun into a blunderbuss! A blunderbuss would fit fine in the bloodbowl setting I think. I could make a cone out of putty and add it to the end of the gun. I could then add a ball to it so it would look like the goblin was shooting the ball.
I am pretty pleased with this idea.
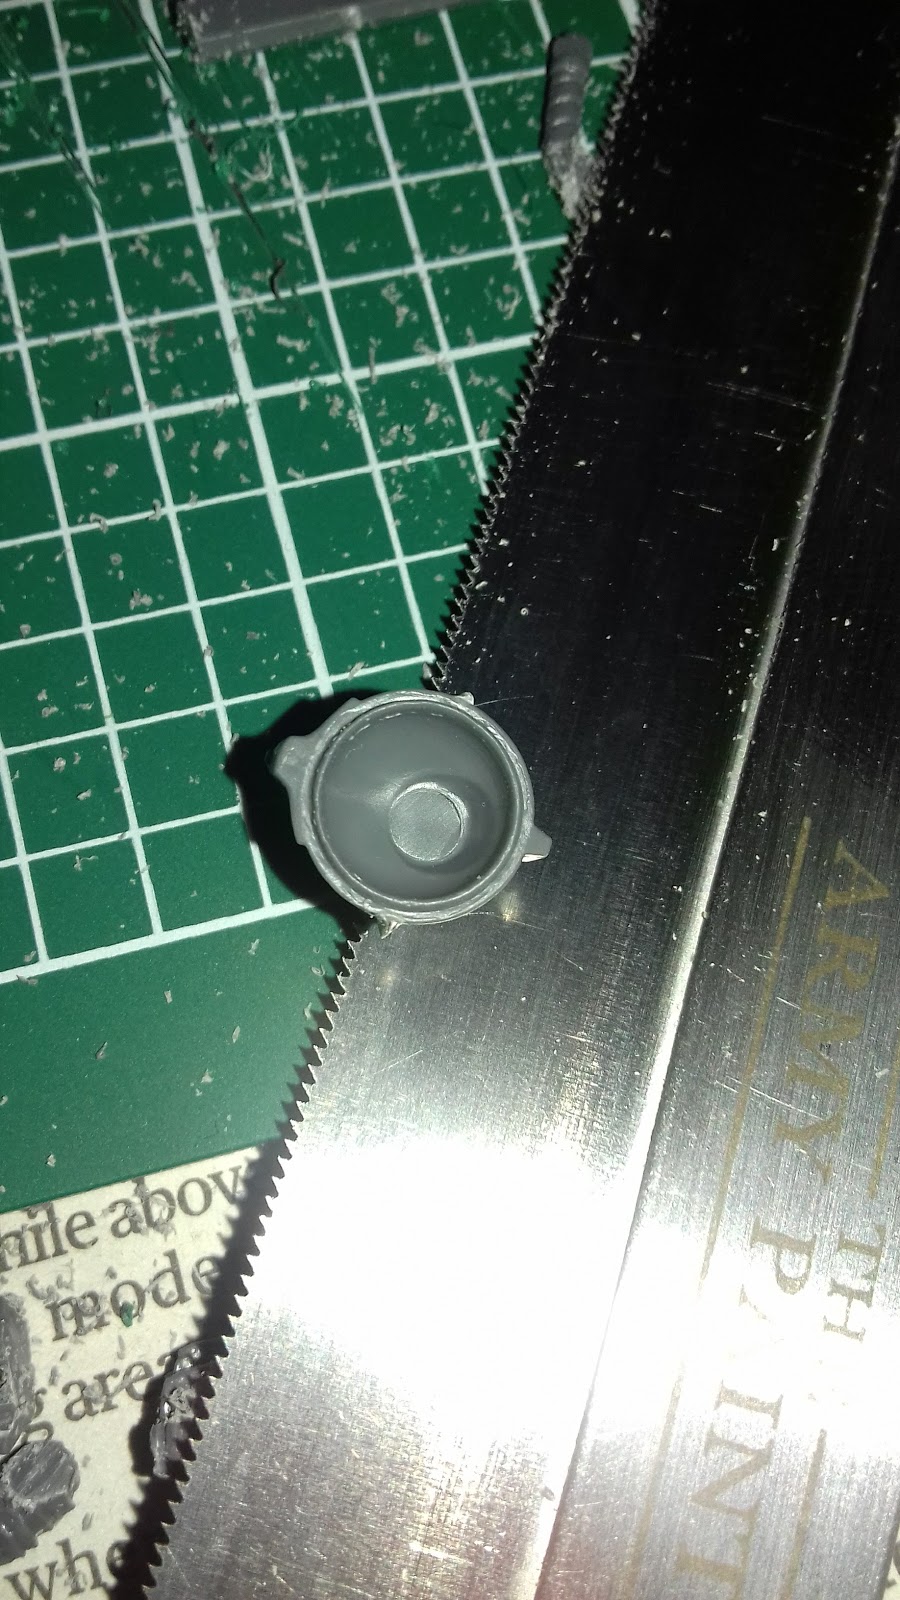
The Orc models were easy enough to put together and didn't involve much modification. Just weapons removed and arms posed. The Goblins in barrels would take much more work.
The Stormboyz kit has rocket packs. I put together the central circular piece and cut off the other rocket parts that were attached. In the photo above you can see the circular body with a fin still attached which I cut off later.
Next I shaped some strips of putty and put them vertically on the rocket body. This was an attempt to make planks, to make it look like a barrel. See photos below for work in progress.


I wasn't sure if I was getting the barrel plank look I wanted so I decided to leave the barrel and concentrate on the blunderbuss. I thought I could model the cone/trumpet piece out of putty and stick it to the end of the rifle. I thought wrong.
When I started this project I knew that I was pushing well beyond my skill level, But trying to model with the putty has been a nightmare. Size, proportion, shape, all these things to take into account. What I thought would be a simple task was in fact beyond me. I was pretty frustrated with myself at this point and was ready to give up on the project.
But then it happened. Staring despondently at the sprues on the table; I had an epiphany. Those rocket packs had a cone shaped exhaust piece. CONE SHAPED! Suddenly what I was supposed to be doing became clear. Don't try and create some thing from nothing/scratch. Take what already exists and reuse it in a different more useful way. Stop looking at the plastic bits as they were originally intended and look at them as potential pieces for my model.
From the photos below you can see that if the that plastic piece was used as it was intended the cone bit would be on the inside


I glued it 'backward to the end of the rifle and got the beginnings of a blunderbuss.

From there I was happy to use the putty to join the pieces together shape wise.


I am quite please with how it has turned out so far. I need to be neater with the putty. As you can see I also carried on with the barrel. It is far from perfect, but I can live with it. I have an idea I want to try for the next barrel anyway. Still need to add a football to the end of the blunderbuss.

Liquid Green Stuff
I bought a pot of GW liquid green stuff. To use to cover over/ smooth out the chain mail on the models. I found it quite useful. It takes a number of layers to build up, but the effect looks much smoother then what I was getting with the putty. It also covers up finger prints in the putty, which I seem to get a lot of when using the putty.
I actually find the putty frustrating to use. It sticks to my cutting mat and/or the metal sculpting tools, resulting in it being difficult to get the putty to stay on the model as I want it. I bought some rubber tools used for working with clay, and these give a much cleaner/ smoother finish. I am also wondering if I should work the putty on a baking sheet and seeing if adding water will make it easier to work with.
 |
| New set of rubber sculpting tools |
Good stuff Amit. A small amount of washing up liquid can help avoid the greenstuff sticking where you don't want it stuck.
ReplyDeleteThanks Bryan, Working with the rubber tools, and working on grease proof baking paper has really made a big difference in using green stuff for me.
DeleteI normally lick the end of my sculpting tool before using it on green stuff. Helps prevent any sticking.
ReplyDelete